

Bikelights.nz vs Dick Smith: which is better in 2026
Choose Bikelights if you’re building an MTB night-riding setup around lights, mounts and a compatible high-capacity battery; choose Dick Smith if you already know the exact light you want and its listing confirms the fit, power supply and contents you need. For 2026, the useful comparison is a complete trail setup versus a specific-product purchase—not which shop has the biggest brightness claim.
- Bikelights NZ vs Dick Smith: choose the specialist for a complete MTB night-riding setup.
- Choose Dick Smith for a specific light only when its documented specifications meet your riding needs.
- Compare light heads, compatible batteries, mounts and chargers together—not advertised lumens alone.
- Neither retailer name proves brightness, runtime or compatibility; check the exact product documentation.
Why this matters
A night-trail purchase is more than a light head. You need to see the track, keep the light steady, secure the power source and finish the ride without relying on an optimistic battery claim.
Bikelights is the better starting point for New Zealand mountain bikers building a complete night-riding setup. Its stated range includes MTB and road lights, high-capacity battery packs, taillights and accessories. That makes the shop’s focus relevant to the whole system, rather than just the lamp.
That focus is not proof that every item suits every bike. A specialist purchase still needs the same compatibility checks as any other purchase. Your handlebars have not agreed to fit something just because the product photo looks tidy.
At a glance
Use this 2026 comparison to choose your shopping route. Then judge the actual products against your ride.
| Dimension | Bikelights | Dick Smith |
|---|---|---|
| Best for | Riders assembling an MTB lighting system | Buyers checking an already-selected light |
| Shopping approach | Start with the ride and build the setup | Start with an exact model and verify the listing |
| Standout distinction | Stated focus on cycling lights, battery packs and accessories | A specific listing can answer a specific purchase brief |
| Battery planning | High-capacity battery packs are part of the stated range | Verify the selected light’s power arrangement |
| Mounting | Check the exact mount and included parts | Check the exact mount and included parts |
| Brightness and runtime | Judge documented operating conditions | Judge documented operating conditions |
| Buying model | Product purchase; assess the complete setup | Product purchase; assess the complete setup |
| Best next move | Define the light, battery and mounting combination | Match the exact model, contents and requirements |
The specialist wins when you’re building a complete setup
If you’re starting from scratch, make the whole system your shopping brief. A light head without the right battery, charger or mount is not a finished trail setup.
The specialist’s stated cycling-light and battery range makes it a sensible starting point for that job. Begin with your riding: forest trails, unlit access roads, technical climbs or a mixture. Then work through what needs to attach to the bike and what needs to power it.
Best for: the mountain biker assembling a first setup or replacing several connected parts. The advantage is the relevant product focus, not an automatic promise of better performance.
The limitation matters too. Separate products do not become compatible because they share a shop. Confirm the complete combination before ordering, including any accessories shown in pictures but not explicitly listed as included.
Dick Smith fits an exact-model purchase better than an open-ended search
Choose Dick Smith when your research has already produced an exact model and the listing documents the version you need. This is a narrower task than asking a retailer to be the starting point for your entire night-riding system.
Best for: the buyer replacing a known light or purchasing a model already checked against the bike. You can concentrate on model identity, included parts and the seller’s stated terms rather than restarting your equipment research.
The strength here is the defined purchase brief. The limitation is that a familiar product name does not settle every detail: a light head, a kit and a differently bundled version are not interchangeable purchases.
Do not choose this route just because a headline looks appealing. Choose it when the listing answers your actual questions. If it leaves the battery connection or mounting arrangement unclear, the purchase brief is not finished.
A high-capacity battery belongs in the setup decision
For longer night rides, treat battery choice as part of the initial purchase—not a problem to solve after the light arrives. The specialist’s stated high-capacity battery range makes power planning a relevant reason to start there.
Capacity alone does not establish suitability. Check the required voltage, connector, charging arrangement and the manufacturer’s compatibility guidance. A plug that physically connects is not enough evidence that two electrical products belong together.
Use these 4 component checks before you commit:
- Light head: identify the exact model and its supported power source.
- Battery: confirm the electrical requirements and stated compatibility.
- Mount: check how the light and battery attach to your bike.
- Charger: confirm the charging equipment required for that battery.
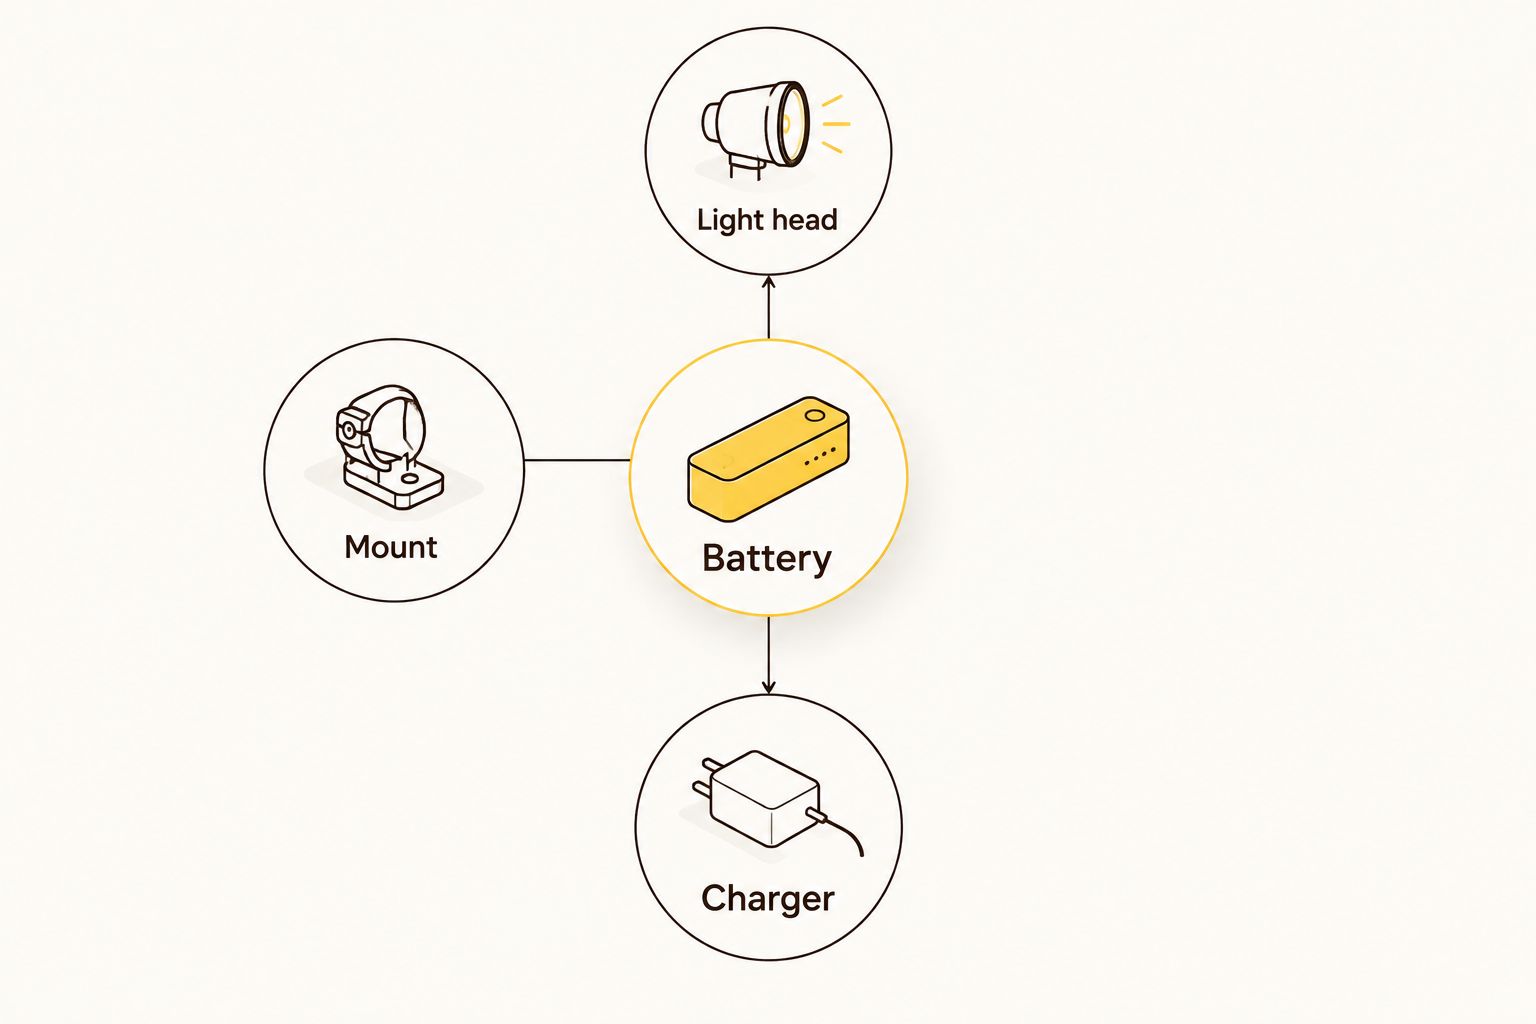
For a replacement pack, use the bike-light battery compatibility guide before comparing capacity claims. The right battery is one that meets the light’s requirements and can be secured properly—not simply the largest figure on a listing.
Neither retailer wins on brightness claims alone
An advertised lumen figure is a claim about light output, not a complete description of what you’ll see on a trail. Beam shape, aim and the operating mode all belong in the decision.
For your 2026 shortlist, separate 2 riding tasks: seeing the ground ahead and being visible to other road users. A light selected for one task does not automatically meet the other. Check the stated intended use rather than treating every cycling light as a trail headlight.
For MTB use, look for information that helps you judge both the track immediately ahead and the direction you’re travelling. If beam images are supplied, consider whether their camera settings and conditions make comparison meaningful.
This is an honest tie. Neither retailer name turns an advertised output into an independent measurement. Do not declare a brightness winner without comparable evidence for the exact models.
Runtime is another tie until the operating conditions match
A runtime claim needs context. Check which mode it describes, which battery was used and whether the documentation explains how output behaves during that period.
A long stated duration in a low setting does not answer whether the light will suit your intended trail setting. Equally, a high-capacity battery does not establish a specific duration without the light’s power requirements and relevant operating conditions.
Compare the mode you expect to ride in, not the most flattering number in the description. For 2026 buying decisions, keep the same standard on both sides of the comparison.
Ask yourself:
- Does the stated runtime apply to the battery included or proposed?
- Is the relevant mode identified?
- Does the documentation explain output changes?
- What is your independent backup if the main system stops working?
Neither retailer earns this point by default. The better purchase is the documented combination that fits your route, with a reserve plan rather than a promise stretched to its limit.
A known mounting arrangement favours the exact-model route
An exact-model purchase through Dick Smith makes sense when you have already checked its mounting arrangement against your bike. That is especially useful when replacing a known component without redesigning the whole setup.
However, keep 2 mounting positions separate in your research: handlebar and helmet. They place the light differently and require suitable mounting hardware. Do not assume that hardware intended for one position is approved for the other.
For a handlebar setup, check clearance around cables, controls and other accessories. For any helmet-mounted option, follow the helmet and light manufacturers’ guidance rather than improvising an attachment.
The limitation of the exact-model route is simple: knowing the lamp does not necessarily mean knowing the bundle. Confirm the mount is included where required, and check that any external battery has a secure carrying arrangement. A dangling battery is not a suspension upgrade.
Buying model: compare complete purchases, not isolated light heads
Both options are product purchases. The useful distinction is what you are purchasing together and which additional components you must arrange separately.
Build a like-for-like checklist before deciding:
- The exact light head or light set.
- The compatible battery, where required.
- The necessary mounting hardware.
- The appropriate charging equipment.
- Any separate rear light or backup light your ride requires.
A package is easier to evaluate when its contents are explicit. Separate components give you more choices to verify, but also more compatibility questions to resolve. Neither format is automatically better.
For an existing setup, avoid replacing usable components without a reason. Check whether the manufacturer supports keeping the current battery or mount with the proposed replacement. Familiar connectors and similar-looking fittings are not confirmation.
Before completing either purchase, read the stated delivery, returns and warranty terms for that transaction. Those checks belong beside the equipment decision; they are not benefits to assume from a retailer’s name.
Final verdict: choose by how much setup work remains
Choose Bikelights for a complete MTB lighting setup
Named profile: the trail rider building or refreshing a connected system. Start here when your questions span the light, compatible high-capacity battery, mounts and accessories.
The relevant advantage is its stated cycling-light focus. Your next move is to define the ride, identify the required components and confirm the exact combination. Do not mistake that recommendation for a claim that every product has been independently tested against Dick Smith’s options.
Choose Dick Smith for a fully specified product purchase
Named profile: the buyer with an exact model and a completed compatibility checklist. Choose this route when the listing confirms the version, contents and requirements you have already researched.
The advantage is a straightforward decision brief: you are checking a defined item rather than building a system from scratch. If the listing does not settle the fit or power questions, keep researching rather than filling the gaps with assumptions.
One-glance scorecard
| Dimension | Winner |
|---|---|
| Building a complete MTB system | Specialist route |
| Purchasing an already-verified exact model | Dick Smith, when the listing matches |
| Starting with high-capacity battery planning | Specialist route |
| Brightness claims | Tie: product evidence decides |
| Runtime claims | Tie: operating conditions decide |
| Repeating a known mounting arrangement | Exact-model route, when contents match |
| Complete-purchase comparison | Tie: check every required component |
FAQ
Is Bikelights better than Dick Smith for mountain bike lights?
Bikelights is the better starting point for riders assembling an MTB lighting system because its stated range covers cycling lights, high-capacity batteries and accessories. That does not establish a performance win for every individual product; check the exact light and battery combination.
When should I choose Dick Smith for a bike light?
Choose Dick Smith when you have identified an exact light and its listing confirms the model, required power source, mounting arrangement and contents. A defined purchase is easier to assess than an open-ended search based on brightness claims.
Does a bigger bike-light battery always mean a longer ride?
A larger advertised capacity does not establish a specific runtime on its own. Check compatibility and the runtime conditions for the exact light, battery and operating mode.
Can I use my existing battery with a new bike light?
Use an existing battery only when the manufacturer’s guidance confirms compatibility with the new light. Check voltage, connector requirements and charging arrangements rather than relying on physical fit.
Should I choose the bike light with the highest lumen claim?
No—choose a light with an appropriate beam and documented performance for your ride. Advertised lumens do not establish beam shape, useful runtime or suitability for an unlit trail.
What should I check before buying a complete night-riding setup?
Check the light head, compatible battery, mounts and charger together. Confirm the stated kit contents and decide how you will secure the equipment and manage a main-light failure.
Is a handlebar light mount suitable for my helmet too?
Do not assume a handlebar mount is suitable for a helmet. Use mounting equipment supported by the relevant manufacturers and follow the helmet manufacturer’s guidance.
One last thing
Before your first 2026 night ride with new equipment, fit the entire setup at home and turn the handlebars through their normal movement. Look for cable tension, interference and anything that shifts when you move the bike.
Then practise changing modes with the gloves you ride in. A light can look perfectly sensible on a product page and still be awkward to operate when your fingers are cold. Better to discover that beside the shed than halfway along a dark trail.